Modern apps almost never live on a single screen size. The same product runs on a small iPhone, a large iPhone, an iPad, and increasingly on iPad‑sized phones that fold. When you make a product demo, a teaser for a launch, or a tutorial for support, you usually want to show all of those at once — to communicate that the experience is consistent and that your product looks good everywhere it runs.
The problem is that traditional multi‑device demos are painful. You typically end up recording each phone separately, lining the videos up in a video editor, and hoping the timing matches frame‑for‑frame. By the third take, the magic is gone.
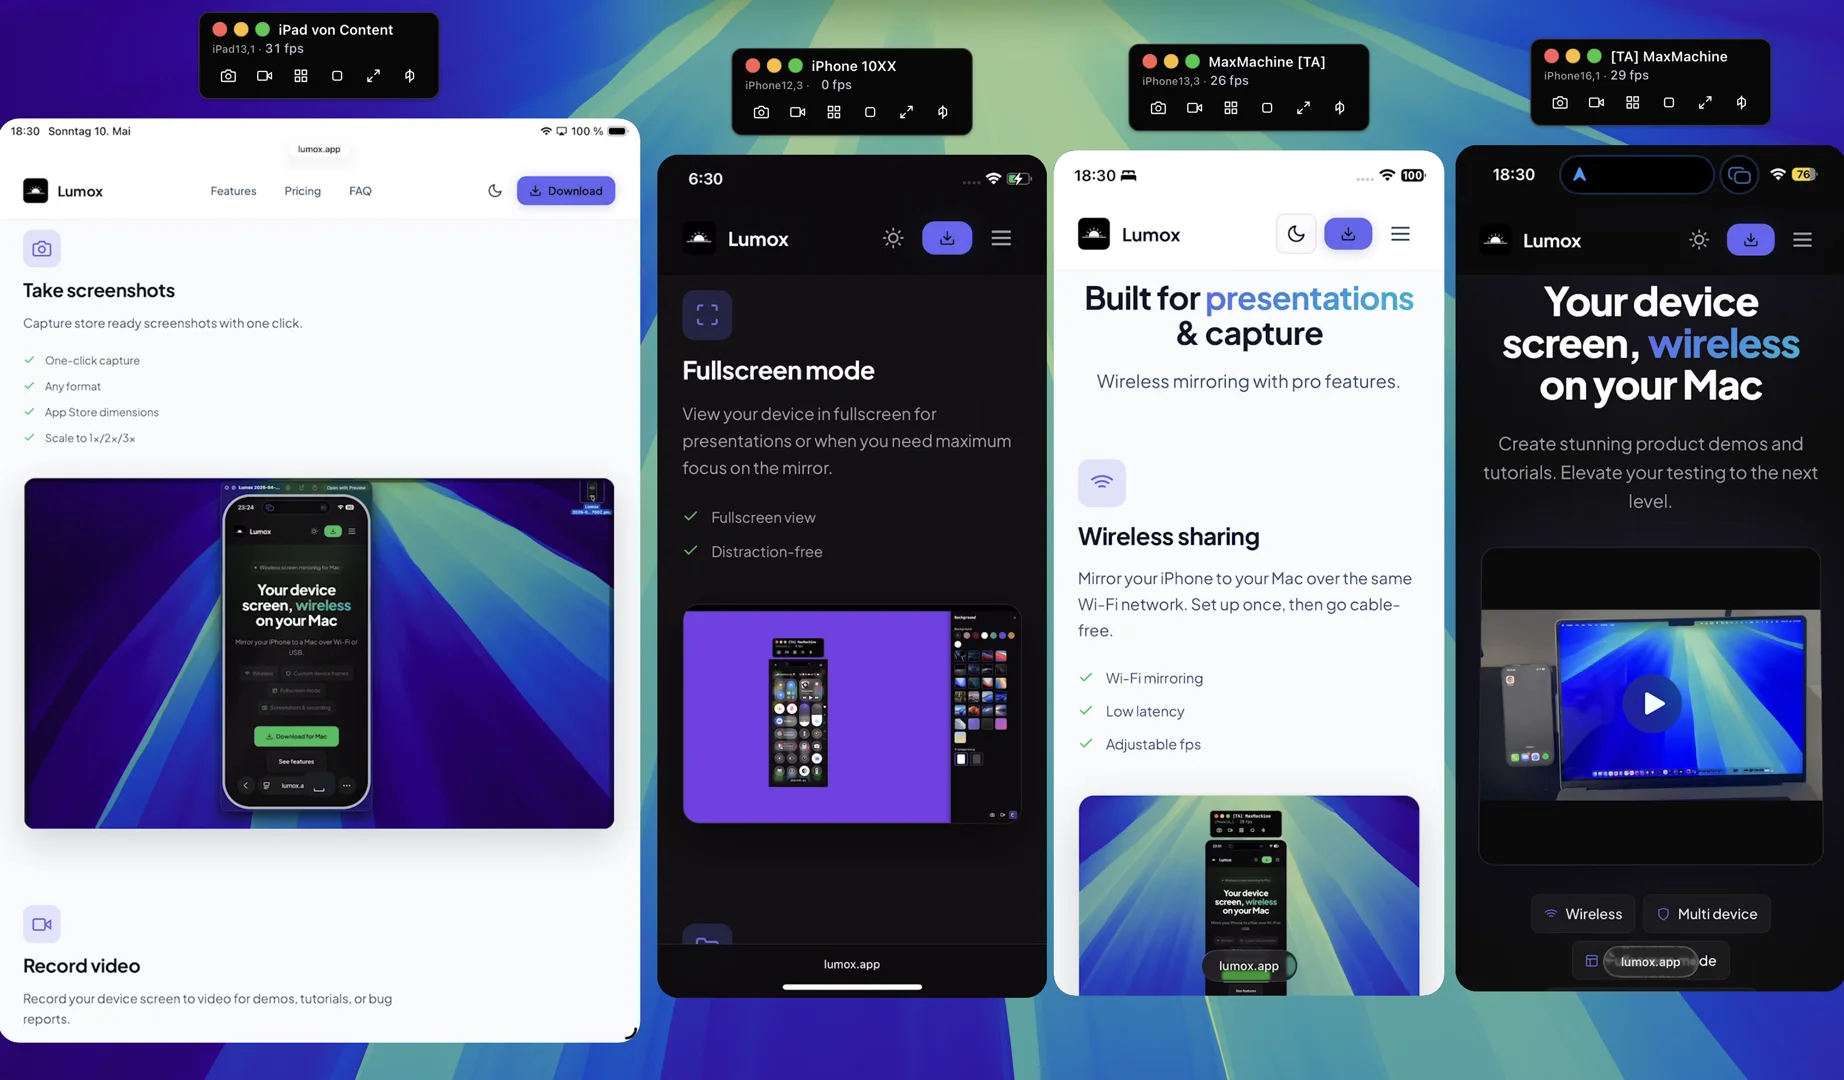
This article walks through a calmer way to do it: open every device in one window on your Mac, scale them side‑by‑side in fullscreen, and record the whole thing as a single video — no editor, no timing tricks. The examples use Lumox as the mirroring app because the multi‑device piece is one of its core features, but the workflow itself is general advice you can carry to any tool.
What you’ll build: a single, polished video that shows your app running simultaneously on two or more devices, recorded in one take, ready to drop into a landing page or social post.
What you’ll need
- Two or more iPhones, iPads, or a mix of both. Old test devices are perfect — they don’t need to be the latest model.
- A Mac running macOS 12 Monterey or later.
- A solid Wi‑Fi network. All devices should sit on the same network for wireless mirroring.
- Lumox on the Mac. The free version is enough to set things up; recording lives in the Pro tier.
A small piece of advance prep is worth doing once: clear notifications, set every device to Do Not Disturb, and unify the time and battery on the status bar. It is the difference between a polished demo and a clip your designer will quietly ask you to redo.
Step‑by‑step: a multi‑device demo in one take
-
Connect your first device
Open Lumox on your Mac. On your first iPhone, swipe into Control Center, tap Screen Mirroring, and pick your Mac from the list. The phone window pops up on the Mac — that is your first “tile”.
Drag and resize the window the way you would any Mac app. This is also a good moment to wrap the mirror in a device bezel if you want one — Lumox includes iPhone and iPad bezels, plus a bezel‑free mode for designers who prefer a clean rectangle.
-
Add more devices to the same workspace
Repeat the previous step with your second device. Each new connection opens its own window in Lumox, all on the same Mac. There is no fixed limit to the number of devices — typical demos use two to four — and Lumox will mirror as many as your hardware can comfortably handle.
If a device’s frame rate dips, drop the FPS for that single mirror in its window settings. A multi‑device demo only needs to look smooth, not the maximum any device can output.
-
Arrange the devices the way they’ll appear on screen
Drag the windows into the layout you want for the final video — small phone on the left, large phone in the middle, iPad on the right is a popular choice. Resize each one until the visual proportions feel honest. If you put a 6.7" iPhone next to a 4.7" iPhone at the same screen size, viewers can tell something is off.
Lumox remembers the position and size of every device. The next time you connect the same phone, it returns to the same spot, which makes recurring demo recordings much faster.
-
Switch to fullscreen mode
With your devices arranged the way you like, hit fullscreen mode in Lumox. The Mac desktop, menu bar, and dock disappear; the devices stay exactly where you put them, on the background of your choice.
Pick a clean background that matches your brand: a stock macOS wallpaper, a flat colour, a marketing gradient, or a custom image of your own. For developer teasers, a transparent or near‑black background tends to make device screens pop. For consumer apps, soft pastel gradients photograph well on social.
-
Run your demo on each device, in sync
Now do the actual demo. Open the same screen on every device first — a feed, a chat, a settings page — then do whatever you want to show: tap a button, swipe between tabs, or trigger a state change. Because the devices are physical hardware, the changes happen on screen instantly with no recording artifacts.
If your hands are full, an extra pair of hands helps: one person drives the phones, another drives the Mac. For solo recordings, plan a short, scripted demo of about 15 seconds and rehearse the taps once or twice.
-
Record the whole composition as one video
Hit the record button in Lumox while still in fullscreen. You now capture everything on the composition — every device, the background, the spatial relationship between them — into a single MP4 or WebM file. No video editor required.
When you stop the recording, the file lands in the Lumox Media Library, where you can drag it straight into Slack, your CMS, your design tool, or your post.
How to make the result look like marketing, not a screen recording
Pick a deliberate layout
Two common patterns work well across most placements:
- Hero + supporting cast. One device front and centre at full size, two smaller devices flanking it. Use this when one form factor is the main story.
- Equal billing. All devices at the same size, evenly spaced. Use this when you want to communicate that the product looks equally good on every form factor.
Both compositions read instantly, which matters because most viewers will see the video for fewer than five seconds before deciding whether to keep watching.
Match the on‑screen content
Showing different content on each device is fine, but make sure the state of your app matches. Using a different account on one phone, or a different language on another, instantly draws the eye in the wrong way. Quick checklist before you record:
- Same logged‑in user across devices (or believable demo accounts).
- Same theme — light or dark — on every screen.
- Same time of day in the status bar where possible.
- Same content above the fold so the first frame already makes sense.
Use real motion, not just static screens
Static device shots are fine, but the multi‑device feature pays for itself once you start doing things on the screens. Some easy wins:
- Tap the same primary button on each device a beat apart, so a wave moves left to right.
- Trigger a real‑time update (a chat reply, a notification) so multiple devices react in unison.
- Rotate one device mid‑demo to show responsive behaviour.
Polish in the Media Library
After the recording lands in the Media Library, you can quickly export it to MP4, WebM or animated WebP — the last one is excellent for landing pages because it carries a fraction of the bandwidth of a full video. Drag the clip directly out of Lumox to your CMS or the file system.
Reuse the same setup. Lumox remembers the size and position of each connected device. Save your multi‑device layout once, and every future demo recording starts in the same place — perfect for changelog videos and recurring social posts.
Common pitfalls (and how to avoid them)
Devices on different Wi‑Fi networks
If a device does not see your Mac in the Screen Mirroring picker, double‑check that it is on the same Wi‑Fi network. Guest networks, work VPNs, and mobile hotspots will all silently break local discovery.
Mismatched screen rotations
Even subtle differences in rotation behaviour read as “rough” in the final video. Lock the rotation on each device in Control Center before you start recording.
Battery indicator changes mid‑demo
A 100% battery becoming a 99% battery during a 12‑second demo will eat your attention every time you re‑watch the file. Plug the phones in or charge them above 80% before recording and they will look stable.
Wrapping up
Multi‑device demos do not have to be a video‑editing job. Connect each phone to your Mac with Lumox, arrange the windows, switch to fullscreen, and record the whole composition in one take. You end up with the kind of video you would expect from a polished product team, but it took a coffee break to make.
If you have not tried it yet, download Lumox and run the workflow above with two devices on your desk. The first time you see your app running side‑by‑side in fullscreen, it’s very hard to go back to single‑device demos.